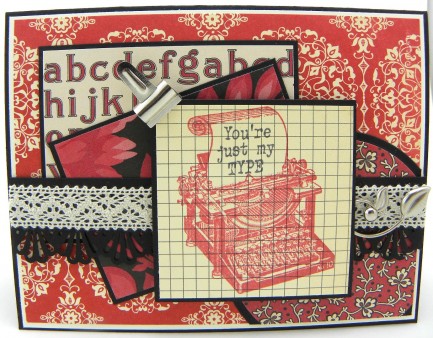
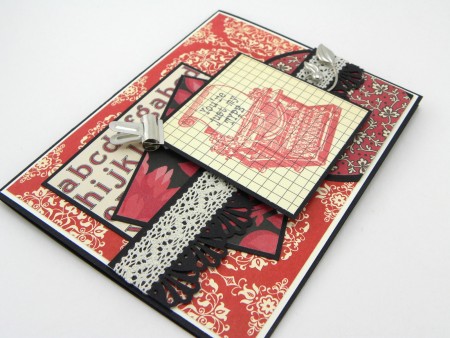
Good morning! This card was published in Scrapbook News & Reviews a few months ago and so I'd like to share it here with you today. It's not necessarily a Valentine's Day card, but can be a card for an anniversary, birthday, or even a just because card. I really let the designer paper do the work for me with this card just stamping the main image and sentiment, then adding a few embellishments, and a punch border. The lace on top of the black punch border is a look that I love. If you look in the lower right hand corner, you can see where I cut part of a Nestability circle to make it square. The hardware of the clip just accentuates the office theme and the flower charm accentuates the flower designer paper, so I have 2 themes going on with this card, but it worked!
Thanks for stopping by to visit me again today and hopefully by now, my studio will be unpacked and semi-functional, but I'm sure I will still need to finish the rest of the house. God bless you and Today's Treasure is Jeremiah 23.


Stamps: Clear Art Stamps Office 101
Card Stock: Papertrey Ink True Black, Stampin' Up! Very Vanilla
Designer Paper: Stampin' Up! Love Letter, Jenni Bowlin Red/Black Extension II Mini Papers
Ink: Memento Tuxedo Black, Stampin' Up! Riding Hood Red
Accessories: Martha Stewart Deco Shells punch, Leaf charm by Flourishes, Stampin' Up! Large Silver Library Clip, Victoria Lace ribbon, Spellbinders Circle Nestabilities
Size: 5-1/2 x 4-1/4

1. Cut black card stock to A2 size.
2. Cut a piece of cream card stock to 1/8” less than A2 size.
3. Cut a piece of designer paper to ¼” less than A2 size.
4. Adhere designer paper to cream card stock.
5. Cut a piece of black card stock to 3-1/4 x 2-1/2 and a piece of designer paper to 3-1/8 x 2-3/8. Adhere the designer paper to the black card stock.
6. Cut a piece of black card stock to 3 x 2-1/4 and a piece of designer paper to 2-7/8 x 2-1/8. Adhere the designer paper to the black card stock.
7. Die-cut and dry emboss a circle die-cut using black card stock.
8. Die-cut and dry emboss a circle die-cut using designer paper.
9. Adhere designer paper to black circle die-cut.
10. Cut the edges of the circle so that it’s flush with the right side of the card.
11. Adhere all made panels to the card as shown.
12. Cut a piece of black card stock to 5-3/8 x 1-1/8 and punch the bottom.
13. Adhere a piece of lace ribbon above the punched black card stock, then adhere the panel to the card.
14. Cut a piece of black card stock to 2-3/4 square and a piece of designer paper to 2-5/8 square, then adhere the designer paper to the black card stock.
15. Stamp image onto the designer paper with dark red ink and stamp the sentiment onto the image using black ink.
16. Place foam dots on the back of the image and sentiment panel and adhere to the card.
17. Place a silver library clip at the upper left corner.
18. Adhere leaf charm to the right of the image/sentiment panel on the lace ribbon.
Related


