Good evening. After the day I've had today, I've got all 3 kids staying the night at a friend's house and I am playing until I pass out, literally. The mad rush to clean the house for the Open House on Sunday can wait until tomorrow afternoon. I will make the house look great, but I'm not going to knock myself out doing it. I know it's a "buyer's market," (and they know this) which is not to my advantage, but I refuse to jump through hoops to satisfy a buyer's nitpicking of a wall color or whatever. I don't see the reason why I should take my time and money to paint a room a neutral color when they're just going to paint over it again to customize it to their taste. I have my limits and I'm going to respect them.
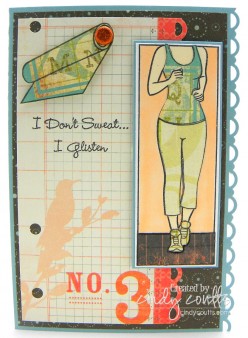
I made this card to decompress because it was necessary. I've been wanting to ink up this stamp set for a few weeks now and decided to do it today. I have several other cards to make but they're for design team work and the Christian Paper Crafts February 22 Blog Hop (don't forget to grab your badge from my sidebar!), so you won't see those cards until then, but in the meantime, enjoy this fun card. Thank you so much for stopping by today to visit me. I am blessed. Today's Treasure is for me more than anything else. Matthew 11:28-30.
So now I'm going to go and grab me a big bowl of ice cream and watch a chick flick. It's either going to be While You Were Sleeping, The Time Traveler's Wife, or The Lake House.


Stamps: My Favorite Things Let’s Get Physical
Card Stock: Papertrey Ink Stamper’s Select White, Stampin' Up! Baja Breeze
Designer Series Paper: My Mind's Eye So Sophie
Ink: Memento Tuxedo Black, Copic markers (E50, YR000)
Accessories: Stampin' Up! Scallop Trim punch, Brights Glimmer Brads (Tangerine Tango), Sizzix dry embossing folder (Tim Holtz Woodgrain)
Technique: Punching, dry embossing, paper piecing
Size: 4-1/4 x 6

1. Cut a piece of light blue card stock to 4-1/4 x 6 so that the crease is on the left side.
2. Scallop punch the right side of the blue card stock.
3. Cut a piece of designer paper to 3-7/8 x 5-7/8 and adhere to the blue card stock.
4. Cut a piece of matching designer paper to 1-1/4 x 6 and scallop punch the left side and adhere to the inside of the card so that the scallops are facing the left of the card.
5. Cut a piece of designer paper with various patterns and elements on it to 3-1/8 x 5-1/8. My piece of designer paper already had the scallops on the right and notebook punch holes. Adhere the designer paper to the right of the card centered.
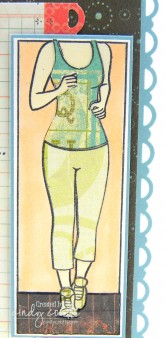
6. Stamp image onto white card stock and color in the skin and outside of the image with markers.
7. Stamp the image again onto various pieces of coordinating designer paper and paper piece onto the image. For the floor paper piece, I ran this through the woodgrain dry embossing folder to mimic a floor.
8. Mat image panel onto a piece of light blue card stock, place foam dots on the back, and adhere to the left side of the card centered.
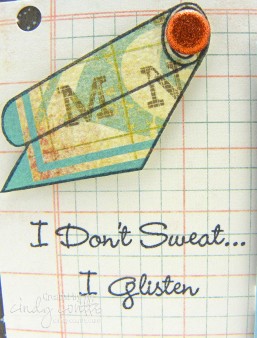
9. Stamp yoga mat image onto designer paper, cut out, and adhere to the right top of the card.
10. Cut the brad stems off of the back of an orange glimmer brad and adhere to the right edge of the yoga mat.
11. Stamp sentiment with black ink directly onto the designer paper between the yoga mat and designer paper image.
Related


Oh, Cindy, you are tempting me! I've seen this set.