
Hello there and a very happy Tuesday to you! As you know, today is my Clean and Simple Tuesday Series where you can learn some fabulous new techniques and be inspired.
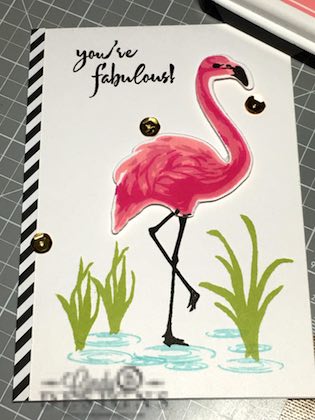
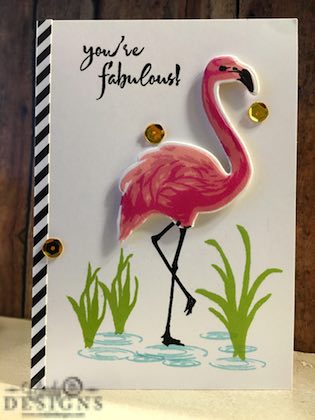
Today's clean and simple card is a 3-1/2 x 5 note card made by Stampin' Up! A full supply list will be below. I inked up the new and fab Hero Arts Layering stamps! I made this beauty from the Flamingo stamp set. I love note cards. They are so easy to make and I give away a lot of them as gift sets to friends and they love them. Since the canvas is smaller, it takes no time at all to make up a quick gift set and package it up all girly pretty.
I used one Hero Arts ink pad and the rest is from Gina K Designs. I love her ink pads. They are big and rich with color. I'm at the place right now where every single ink pad I own needs to be re-inked and that is going to be such a drag, but it's a necessary evil. I also have an insane amount of ink pads thanks to manufacturers who really believe in me and my work. That is why I'm able to offer the $1000 craft prize on my Instagram account. I am sent SO MUCH that it's becoming very overwhelming. Of course, I am extremely grateful and appreciative, but I do receive doubles of items at times and I've had a lot of manufacturers provide the prizes. There is only 8 MORE DAYS LEFT to follow me on Instagram to reach my goal of 500 followers or else no prize. I've had over 100 people follow me so far, and I've only been really working my page for about 5 weeks or so, but need about 375 more followers. I feel that if I extend the giveaway, it will cheapen my reputation and that's very important to me. It will look like I'm desperate and I'm not. I just have some great stuff to give away so tell your friends!
I'm going to try to post as much as possible this week, but I must say that I do have a lot of doctor's appointments. I'm back on chemotherapy, which I absolutely hate with a passion. It does such a number on my stomach. Blech. My garage organization weekend project totally backfired in my face (back). I also didn't keep track of the dates and need to notify prize winners for Jacob's card drive and put up a new monthly Cindy B Designs Challenge for August. That will go up on Wednesday.
Onto more a pleasant subject, such as my note card. The Hero Arts Layering stamps come with the layering stamps and die-cuts for multi-step layering with different colors. I stamped the Flamingo twice with this note card because I accidentally got Versamark Black Onyx Ink on a little bit of the image. I tried to watercolor over it a bit, but it just didn't work. So I went back to the first image I stamped that I wasn't happy with, cut it and layered it over the image I really liked. One thing when you are stamping the image is to line it up with the die-cut. The die-cut is more horizontal than you think. That was my mistake the first time. Be sure to choose good contrasting, yet in the same color group, colors to build up your layering so that all 3 layering images are distinct.
With my card, I decided to stamp a few swamp puddles in the 3 sizes offered and the greenery around my image. The Flamingo legs are stamped directly onto the card stock. A MISTI or stamp positioning tool will help you with this process. As you can tell by my image, I was off when I die-cut it out, yet the image (the one with the black ink on the 3rd layer) is perfect. Murphy's Law. I added some Stampin' Up! strip foam tape to the back of my image. If you take the backing off, you can really manipulate the foam tape and I love that. I then cut a 1/8" border from an MFT Stamps Paper Pack and adhered it to the left side of the note card. I then added 2 sequins and I was done. The instructions with the supply/product list will be below. Affiliate links are used at no cost to you.
Thank you so very much for stopping by to see me today. I really appreciate your support. God bless and have a great day!
Don't forget to stop back by late tomorrow, Wednesday to the Paper Craft Crew challenge. This week it's all about designer series paper and boy do we have some great DSP! I will be doing a process video on my concept of the sketch. I just wish that my new SU Christmas toys would get here!
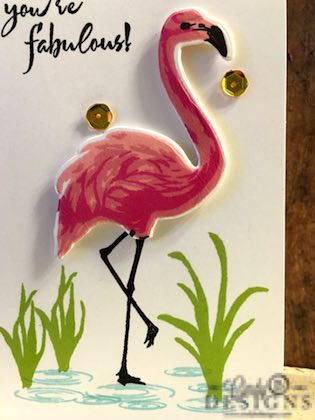


The Gina K Designs Premium Dye Ink is not listed above, as I do not have an affiliate account with them is Jelly Bean Green for the grass, In order of stamping the flamingo from the base to the top is Innocent Pink for my was image on this 4+ step stamng set; Dusty Rose for the 2nd layer and then Passionate Pink for the final layer of the flamingo and again, I used Tuskineko Full-Size VerseFine Black Onyx for the sentiment, flamingo legs and beak of the flamingo. I also forgot to include Scor-Tape that you can pick up at Amazon or MFT Stamps. I used the 1/8" size with Fiskar's Titanium Non-Stick Scissors. Perfect cut every single time.
I do hope that you enjoyed my card and please see the below instructions 🙂

![]() Open up a pack of pre-made note cards from Stampin' Up!, click on link above to purchase, to make a side folding card.
Open up a pack of pre-made note cards from Stampin' Up!, click on link above to purchase, to make a side folding card.
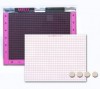
![]() Using your MISTI, line up the flamingo die-cut with the image stamps for placement on the card. Stamp the legs and feet first with VersaFine Black Onyx Ink. Line up the first full image with the die-cut and stamp your lightest full flamingo image with GKD Innocent Premium Dye Ink onto a separate piece of Whisper White card stock by Stampin' Up! Continue to stamp on top of the flamingo image with GKD Dusty Rose as your 2nd image and Passionate Pink as your 3rd image. Die-cut out the flamingo image with the coordinating die-cut using your Big Shot so that you get a full image. Keep in mind that flamingo's are straight up and down in nature and not at an angle when stamping.
Using your MISTI, line up the flamingo die-cut with the image stamps for placement on the card. Stamp the legs and feet first with VersaFine Black Onyx Ink. Line up the first full image with the die-cut and stamp your lightest full flamingo image with GKD Innocent Premium Dye Ink onto a separate piece of Whisper White card stock by Stampin' Up! Continue to stamp on top of the flamingo image with GKD Dusty Rose as your 2nd image and Passionate Pink as your 3rd image. Die-cut out the flamingo image with the coordinating die-cut using your Big Shot so that you get a full image. Keep in mind that flamingo's are straight up and down in nature and not at an angle when stamping.
![]() Use Stampin' Up! Foam Adhesive Strips, Item 141825, after removing the backing tape to shape and form around the flamingo image (this makes it so much easier and provides you with more coverage) and adhere it to the top of the flamingo image for dimension.
Use Stampin' Up! Foam Adhesive Strips, Item 141825, after removing the backing tape to shape and form around the flamingo image (this makes it so much easier and provides you with more coverage) and adhere it to the top of the flamingo image for dimension.
![]() Stamp around the flamingo feet with Hero Arts Tide Pool ink the 3 various sizes of water puddles in the stamp set to add texture and dimension to the front of the card stock. Stamp in the greenery with GKD Jelly Bean Premium Die Ink.
Stamp around the flamingo feet with Hero Arts Tide Pool ink the 3 various sizes of water puddles in the stamp set to add texture and dimension to the front of the card stock. Stamp in the greenery with GKD Jelly Bean Premium Die Ink.
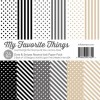
![]() Trim a piece of black diagonal strip paper from MFT Dots & Stripes 6×6 Paper Pack and adhere to the left side of the card with Scor-Tape.
Trim a piece of black diagonal strip paper from MFT Dots & Stripes 6×6 Paper Pack and adhere to the left side of the card with Scor-Tape.
![]() Arrange and adhere 3 Metallic Gold sequins from Pretty Pink Posh or Stampin' Up! with Ranger Multi-Matte Medium to the front of the card using the Rule of Odds.
Arrange and adhere 3 Metallic Gold sequins from Pretty Pink Posh or Stampin' Up! with Ranger Multi-Matte Medium to the front of the card using the Rule of Odds.