Hello there! Catchy title, huh? Kathy Rac, if you don't know who she is, Google her, she's only the goddess of everything color, is having another one of her 30-day coloring challenges. I love them. It's just to get you coloring daily, even if it's only for 5 minutes. I'm taking the 5-minute part pretty seriously. You don't even have to make a card, just color. It's cheaper than therapy, sorta, but a lot more fun!
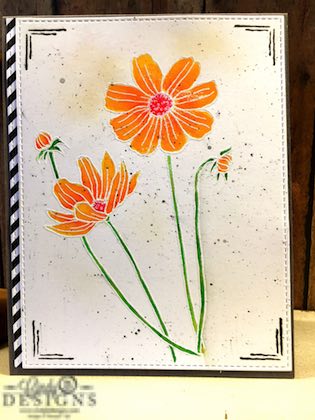
Today I made a card that's "different," in more ways than one. I'm a splatter virgin so I thought that I would try it and winged it all the way. I used the wrong ink and paint brushes. My ink wasn't dry when I turned the card over to adhere it to the card base, but before that, I adhered it crooked to the other card base and pulled it up really fast and managed to get Scor-Tape up. That alone deserves a metal. I didn't even use a spatula, which is something you really need close to you at all times. Mental note. I'm still of the belief that not every card needs a sentiment on the front. I break craft rules. I'm okay with it.
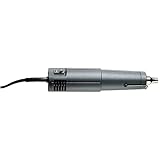
So, I splattered for the first time and then intentionally burned my card stock while heat embossing the images with white embossing powder. You just hold a really good and hot heat tool down on the paper until you start to see the scorch marks and then move to the next spot. When my room started to smell and the main house alarm beeped, like home alarm system beep, I turned my heat tool off immediately and started to fan where the smoke detector was in my craft room with my giant Stampin' Up! grid paper pad. I kinda trashed it a little bit, but it's better than having the police and a fire engine show up at your house for a false alarm. You are granted one false alarm, after that, you are charged a 4-digit fee. No thanks. This was the 2nd time I had ever intentionally burned my card stock and it leaves a pretty awesome shadow. I should do a video on it for you, but I will open up my windows in my craft room and hot flash my way through it all.
I would like to thank you for stopping by to visit me today. Please remember my $500 prize giveaway on Instagram (cindyblancett) that will close on August 15 and I will draw a winner on August 17. I have so much to give you. I've put it all together and tried to take a picture, but there is so much stuff that I can't get it in one frame. I will just have to get creative and post it on my IG account. I'm pretty excited about this and have some fabulous manufacturers on board!
Until the next time, God bless and have a great day! If you would like to purchase any of the products that I used, please click on the links/pictures below. Affiliates links are used where appropriate. Also, please remember my card drive for Jacob Priestly as that is closing on July 31 and I have some great prizes up for grabs on that as well on my blog and at the Paper Craft Crew.

![]()
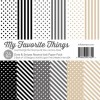
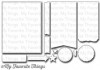
Cut a piece of My Favorite Things Stamps Gravel Gray card stock to an A2 top-folding card. Cut a piece of MFT Dots & Stripes Neutral slanted stripes at 1/2". Run through your die-cutting machine using MFT Die-namics 13 and adhere to the left side of a Bristol Strathmore Smooth card stock, also die-cut in full with MFT Blueprints 13. You want a slight edge to the left showing the stitch detail. I have found that Bristol is the best brand of card stock to use with Zig Clean Color Real Brush Markers.
![]()
Using an embossing buddy, completely cover the Bristol Strathmore Smooth card stock. Adhere the flower image from Stampin' Up! Helping Me Grow photopolymer stamp set onto the Bristol Smooth card stock and pick up the image with your MISTI tool. Ink up the stamp thoroughly with Versamark Ink and put up in your desk light to make sure that the entire image has been covered with Versamark. If you are unsure, ink up the image again and close the door on the MISTI for precise placement of the image; then sprinkle with white embossing powder tapping off the excess embossing powder and then heat emboss the white powder. When you have completed that, then direct your heat tool to where you would like to shadow burn the card stock until you see the scorch, then move to your next desired mark.
![]()
Color in the flower image with various and your chosen colors of Zig Clean Color Real Brush Markers, or whatever coloring medium you choose. What type of coloring medium you choose, that will dictate the type of card stock that you use. Layer on color as appropriate with a watercolor brush or an AquaPainter using a paper towel to soak up the excess to achieve your desired effect. I used 2 greens for the stems, 2 yellow/orange colors for the flowers, and 1 red marker for the center of the flower. Very easy. On the Bristol card stock, blending is a breeze with or without water. With my card, I used water and the Bristol card stock handled it just fine; however, you do not want to super saturate the card stock. Use a paper towel when necessary to pick up and remove the ink.
![]()
Let dry or heat set to speed up the dry time and then splatter on black ink. I used Tim Holtz Distress Black Soot by inking up an acrylic block, misting it with water, saturating my AquaPainter and then using a wood paint brush to tap on my splatters. Do not make the same mistakes that I did mentioned above. There are a lot of videos on You Tube to teach you how to splatter. There is a method to this to achieve your desired look, as crazy as it sounds. This is one technique where you can't break the rules.
![]()
Stamp around the edges of the image panel one of the corner images from Stampin' Up! Helping Me Grow with Versamark Black Onxy Ink. Let dry!
![]()
Adhere very strong adhesive to the back of the image panel and adhere to the MFT Gravel Gray card stock base.


Great card! I have never heard of intentionally scorching a card! Very cool technique! I am going to try it but I think it has got to be a card with marshmallows and a camp fire! Thanks for the heads up on opening a window too! LOL!
You just gave me a great idea of scorching a great fall card with marshmallows and a campfire. MFT has a few sets that would work perfectly! Thank you!