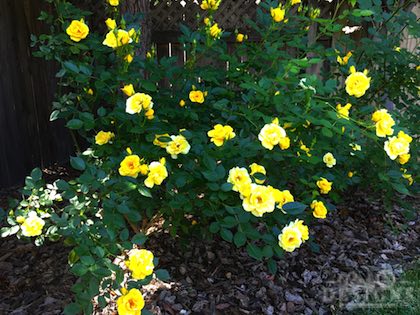
Hello there everybody! Today's clean and simple card was inspired by my beautiful and vibrant yellow rose bush in my backyard and it also works perfectly for the Altenew April Inspiration Challenge. I chose the vibrant yellow colors and florals you see in the inspiration picture.

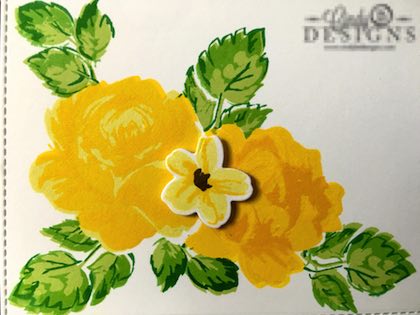
I thought that this would make a great clean and simple card. I used Altenew Stamps. They have wonderful images that mainly build upon each other through just regular stamping. Their flower stamps are one-of-a-kind and most have 4-step stamping for exquisite detail. I am much more happier with my rose on the left than I am on the right. I also made some fatal mistakes along the way, 2 of them, but after all of the masking and layering up my stamps, I was determined to salvage this card.
All of the stamps I used are from Altenew of Vintage Roses (images) and Quilled Elegance (sentiment). My card stock and premium dye inks are from My Favorite Things Stamps.
I started with a side-folding A2 card base in Hot Fudge and cut a piece of Smooth White Card Stock with Blueprints 13 for my stitching detail around the edges.
I started to layer up my roses with Lemon Chiffon, Banana Split and Lemon Drop Premium Dye Ink for the rose on the left. For the rose on the right, I used Banana Split, Daffodil and Pineapple. For all of my leaves, the colors I used are Sour Apple, Green Room and Field Day, You're not always going to get perfect alignment, although sometimes you do and sometimes you don't Either way is okay.
There's a variety of ways to build up multi-step stamping. I always start with the solid large image on the bottom with my lightest color, the next layering image is with my medium color and the top layer is with my darkest color. Depending on how many layers you have, the more ink colors you will need. I've also seen this done the reverse way. You have to do what you feel comfortable with and what gives you the best results.
I used my MISTI to build up my layers and then the first mistake happened. It's very important to clean around the edges of your MISTI and cover so your fingers and hands do not get inky. In the lower right corner, that is why you see that lone flower and that's to cover up a smudge. When you close the door of your MISTI and if there's ink on the edges of the frame of the MISTI, you open up the lid, go about your business, stamp again and realize that the side of your pinky finger was laying in ink. I was pretty bummed but knew I could fix it.
For my second mistake, which was the worst and I really wanted to showcase the roses stamped next to each other in an overlay, which you now cannot see since I had to cover that with another flower that I stamped and die-cut out. When you do any type of overlay technique, you have to use masking paper or a Post-It Note, something sticky that is low tack to cover your image. I used Eclipse Masking Paper, which I have not used in a few years. I stamped the solid portion of the rose onto a piece of the masking paper using very light gray ink and then fussy cut it out and adhered it to the rose on the left and continued to stamp the rose on the right. I left my masks on which I was stamping the flowers so they look like they are behind the flowers and you do pick that up on my image.
I did start this card yesterday and left my masks on overnight, but that shouldn't make a difference. I did notice that my yellow inks bled through the masking paper so it's back to Post-It Notes for me when I mask from now on.
It's supposed to be like Christmas morning when you take your masks off for the big reveal to see your work. Well, I did that expecting beautiful flowers and I don't know what happened, but there was this gray smudge right in the middle of my floral overlay. I tried to lightly erase it with no luck. I figured that I would just do what I had done in the lower right to add another flower. While it's still a nice card, that flower in the middle does not belong there and I absolutely was not going to toss my panel. In a sense, it worked out in the long run as I was able to get a visual triangle with the Hot Fudge Premium Dye Ink with the sentiment and flower stamens.
So there you go, some do's and don'ts of multi-layer stamping and looking around, even in your own backyard, for inspiration.
Thank you so very much for stopping by to visit me today. I hope that you have a great day and God bless.


Shop Cindy B Designs Boutique. You will love the experience! Simply click on the shopping bag above and enter a world of beauty hand-crafted for you.

Need Stampin' Up! products? Just click on the button above to shop with me 24/7 from the comfort of your own home!