Hello my friends. Welcome to the Skipping Stone Designs Blog Hop! Today all of the designers will be showcasing various products and projects for you, all of which use a technique or tip, so be sure to stop by their blog and leave a comment.
I had started on a lovely Christmas card for my technique, but I will show you that later in the month. My card today utilizes 4 stamp sets and that's my technique and tip for you is how to pick out numerous stamp sets and get them all on a card tastefully. My card size is 4-bar rather than the standard A2, but I managed to get a lot of color and a nice pattern with a background stamp. I'm going to focus a bit more on background stamps and how vital they are to any stamp collection due to their versatility. I am showing you just one way to use a background stamp today.
I am now finally in the habit of finishing the inside and making a coordinating envelope when I craft. That only took about 8 years, but it makes a huge difference if you're in a hurry in that you will have something to grab immediately.
The 3 stamp sets I used for my flowers and sentiment are Beautiful Botanicals, Dandelion Dreams and Heartsong 2. My background stamp is Timeless Textures. There are 3 backgrounds in this set. So many possibilities and background stamps are so easy to stamp and line up so you get a continuous pattern.
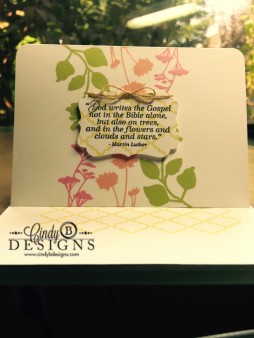
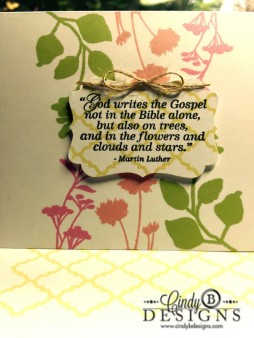
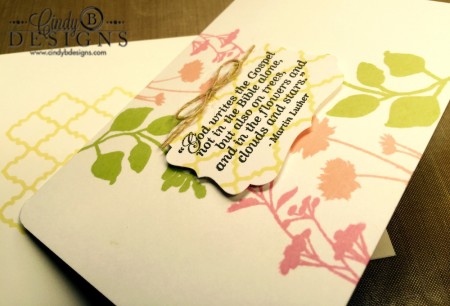
I used the Moroccan pattern from Timeless Textures and stamped it with yellow ink onto a piece of white card stock. I used all Hero Arts Shadow Inks for the soft look that I wanted to achieve. I then stamped the sentiment using black ink on top of the pattern, punched it out, tied small jute bow and adhered it to the top of the sentiment with foam tape for dimension. It looked pretty naked without a little something to separate the sentiment from the images, so an appropriately sized embellishment was a necessity. It also helps make the sentiment stand out and balances out the card. Rounding the top corners also adds a bit of softness to the card.
I carried the colors and images through to the inside of the card and stamped my sentiments. Don't forget to keep your inside balanced too!
Another fun thing I like to do is dress up my envelopes with a liner and stamped images. For my envelope, I stamped the Moroccan pattern in its entirety onto the envelope where you would write the recipient's address. I chose an ink color that is light enough, stands out, yet you will be able to write on the image too. What you end up with is a great card that coordinates very nicely together without being so matchy-matchy to keep it interesting; which brings me to how to pick and choose stamp sets to get the best mileage out of them while keeping your continuity.
I love the flowers from both Beautiful Botanicals and Dandelion Dreams, so I mixed them up to break them up, yet they compliment each other perfectly. For the type of card I wanted to make, I chose Heartsong 2 for the sentiment. When I stamped the flower images, I made sure to keep the darkest color (green) towards the outside so that it draws your eye to the sentiment. Realistically, I have 2 flowers stamped next to each other with the leaves on the end, when usually, our first instinct is to stamp the leaves in the middle with the darker ink color and for more balance. I used the leaves to frame my sentiment and since the leaves are on the outside, it automatically draws your eye to the sentiment while still appreciating the flowers. At one glance, you get the entire card.
Now that I'm doing the inside of my cards too, it's a huge time saver so you don't have to go on a mad hunt for what you used for the outside to put on the inside. Dressing up the inside makes the card look beautiful, literally inside and out, and I know sometimes, I think the inside looks better than the outside, so I've been doing that a lot lately too. I use the same design process when I'm stamping the inside of my card.
I hope my thought process while making a card inspires you and gives you a few ideas on how to mix and match stamp sets and incorporate background stamps into your projects.
Most of all, it's okay to make images any color that you want, even red. It's all about the creativity and what makes you happy.
Thank you so much for stopping by to visit me today. Have a great weekend and God bless!
I also promise to try to find a camera this weekend too. iPhone pictures are awful.


Shop Cindy B Designs Boutique. You will love the experience! Simply click on the shopping bag above and enter a world of beauty hand-crafted for you.

Need Stampin' Up! products? Just click on the button above to shop with me 24/7 from the comfort of your own home!
Very comforting card….
Beautiful- the whole set!
I love these stamps together and often forget to mix and max them. I find this to be fun b/c it adds a little uniqueness to the card bc most won't mix and match sets. Love this idea!Heidi
Beautiful card! Can't wait to see the Christmas card you created!
Very pretty, soft colors…I love the idea of decorating the inside and the envelope at the same time.
Thanks for sharing your design process and this beautiful card! Love the way you combined stamp sets and then decorated the envelope to coordinate!
This is such a pretty card and I like the way you carry the design inside and even on the envelope. What a special pick me up for a friend
wowww, that card is so cute!!!! Thanks for your tips!!!!!!!
I can't see my comment so I'm leaving another one just in case. Love how you combined the various stamp sets and made such a pretty card. Especially like the envelope design, which gives a preview of what's inside!
What a lovely card!
I do like the idea of finishing the inside of the card,
but usually run out of time. Love the colors!