Hello there my friends. This is a card that I made for Aiden, my baby grandson. He's almost 16 months old now. He's walking and talking. I love the sound of his laugh and his little baby voice. I wish I could be with him but I am grateful for what I do have and will take what I can get. He is just the most adorable and beautiful baby in the history of forever. I thought that this robot card would be perfect for him. If he's anything like his father, it won't be long before every single electronic is taken apart in the house. It's a total game changer when they take apart their toys and then they don't work anymore, but they are so heartbroken that you go out and get them a replacement toy.
I made Aiden an entire zoo of handmade darling stuffed animals for Christmas that I will show you soon. They turned out so soft and lovey.
I grabbed my sketch from My Favorite Things Wednesday Sketch Challenge 244 (MFTWSC244). I'm also going to enter this card into the My Favorite Things You Could Be a Design Card Superstar Contest.
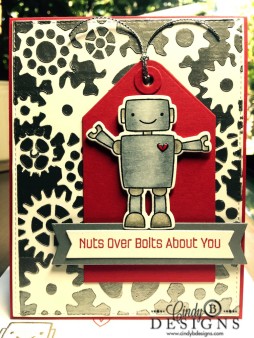
I used shiny silver embossing paste over a Gears stencil onto Smooth White Card Stock. You can also use silver card stock and white embossing paste if you don't have silver paste. The end result will be the same. I think he would like the shine of the paste. I was going to mix up some Grout Gray or Steel Gray reinker with translucent or white embossing paste, but then remembered I had some metallic silver paste and it worked out perfectly. It definitely adds some fabulous texture and dimension to the card since it has to be perfect for my grandson. Also, since I am using gray Copic markers to color the robot, it would have been too gray heavy and not balanced, despite the red. I had to restrain myself from adding glitter or Googlie eyes, even though it would have been cute, but this a baby boy card. For the main parts of the robot, I intentionally chose the Cool Copic colors and for the other parts of the robot body, I am choosing the Warm Copic colors for a nice contrast. I'm also very grateful that my R29 for the robot's heart did not bleed out. With an image that small, it's best to dot in the image rather than color. Not all robots have to be as generic as mine in color. Iron Man was pretty equal opportunity with the color of his suits and the actor who portrays him would look good in a potato sack.
Embossing paste as a rule dries quickly, but I put a good layer on, gently pulled up the stencil and then made a beeline for the sink so that it would not dry on my stencil. To clean your stencil and application tool, you can wash the tool with dish or hand soap and a sponge. Do not use a sponge on the actual stencil because it can and will distort/ruin your stencil images and lines…ask me how I know. To clean your stencil, put enough soap on your hands and wash it gently between your hands and your stencil will be as good as new. I have not tried to speed up the drying process either with a heat tool, as it will bubble up on you; however, you might want that look. I use 1" thick Post-It Note Tape to anchor my stencil to my craft mat and also put a few strips of temporary adhesive on the back of the card stock. I'm typing this blog post up as I'm making Aiden's card and a fly keeps landing on my embossing paste. My panel turned out great and I will let it completely dry for a few hours while I work on the rest of his card.
If you ever want to use silver metallic embossing paste and want a perfect match with Copic markers, use the Warm colors. W4 is a dead on match.
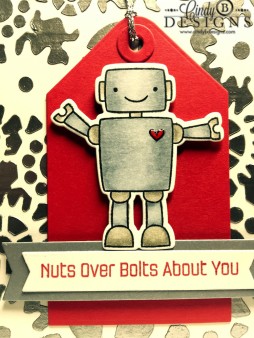
I applied Clear Pico Embellisher on the robot's heart to shine that up just a tad. As usual, I have my dimension via foam tape.
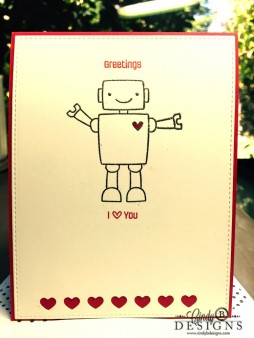
For the inside of the card, I once again die-cut Smooth White card stock using Blueprints 15. I used a row of hearts from Tag Builders 3 Blueprints to die-cut into the Smooth White card stock to have the Red Hot card stock peek through. I stamped the robot again with Versamark, covered it with Liquid Platinum embossing powder and heat set that. I stamped my sentiment under the robot with Red Hot Premium Dye Ink. It took a lot of self-restraint not to grab a Tim Holtz metal gear and color it with some alcohol ink and adhere it to the inside of the card. That would have looked awesome, but also very weighty. Adhering this to the envelope for hand delivery would be very cool or even tying silver cord around the card and threading through the gear to wrap up as a present. The inside of this card is so cute that it could be the front of a clean and simple card.
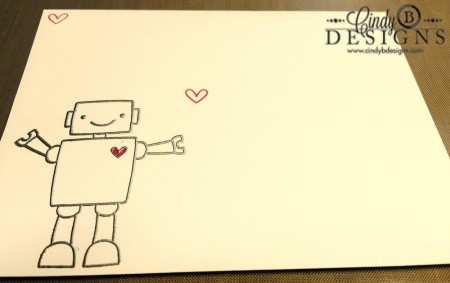
For my envelope, I once again stamped the robot described as above and lined the envelope with My Favorite Things Dots & Stripes Neutral 6 x 6 Paper Pack. When you heat emboss your envelopes, make sure your heat tool is as hot as possible and hold your envelope as far away as possible to ensure a warp-free envelope.
Unfortunately, I'm still taking pics with my iPhone and it definitely shows in the quality despite how much monkeying around I try to do to improve the quality. Sigh.
I think the Bionic Bots stamp set is perfect for little boys and big ones too since there are some great sentiments in the stamp set making it very versatile. If you're giving a card made with this stamp set to an avid 80s fan, you could also type in the nonsense wording from Styx's Mr. Roboto – I was never a Styx fan (truthfully, I can't stand them), but my youngest son would get a kick out of this. Aiden is still a baby, but they still know their stuff. I love you very much Aiden and I miss you more.

Psalm 103:17.
 '
'
All products used are by My Favorite Things unless otherwise stated.


Shop Cindy B Designs Boutique. You will love the experience! Simply click on the shopping bag above and enter a world of beauty hand-crafted for you.

Need Stampin' Up! products? Just click on the button above to shop with me 24/7 from the comfort of your own home!
I'm glad I discovered your blog through MFTS… as a fellow Christian crafter, I think I'll really enjoy following you! Your card is well-executed from design to finish! Good luck, & most importantly, may God continue to bless you! 😀
Sweet little card! TFS