
Hi fellow crafty people. Welcome to the North Coast Creations October New Releases! I am so glad you stopped by to visit me today! I have 2 cards to share with you from the new release and 1 tag. We will be choosing 2 winners who will receive a $10 gift certificate to the store for stamps just commenting on our Design Team projects! You have until October 17, 2013 at 10 pm EST to make a comment on each of our designer's blog posts. Our 2 random winners will be announced on the North Coast Creations Blog on October 18, 2013. Look below for a full release of our new stamps! Be sure to visit the rest of the Design Team's card for this release to see the cards and projects that they made for you.
North Coast Creations also has the usual social media avenues of Facebook, Pinterest and the Blog. Be sure to Like our Facebook Page and get inspiration from our Pinterest Board, then sign up to get feeds from our Blog so you don't miss a thing. You can also pick up the blog badge to proudly wear on your blog too. The code is already provided for you.
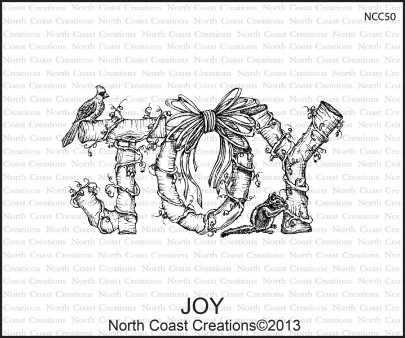
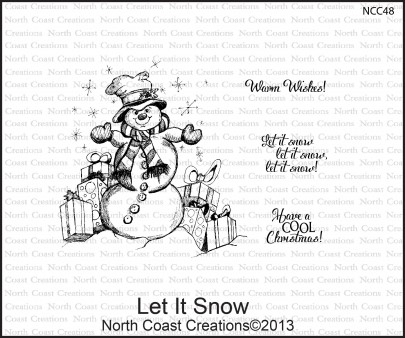
We have 3 brand new releases this month of Joy, Let It Snow and Warmest Wishes. Here are pictures of the full release in its entirety! Aren't they great? I had way too much fun coloring them.
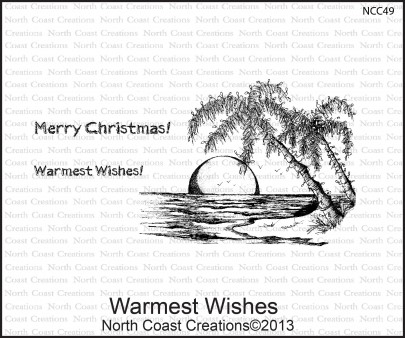
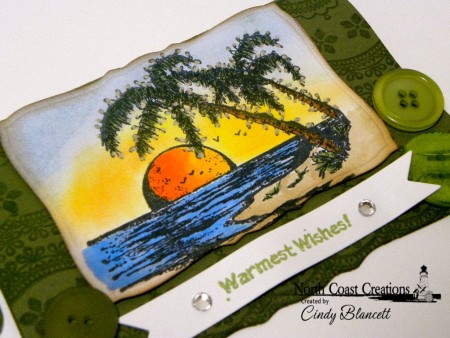
Warmest Wishes is perfect to send to anybody who lives in a warm climate, such as Florida, for Christmas OR, if you live in Florida, you can send it to somebody in New York who's freezing their caboose off at about this time and digging themselves out of a few feet of snow, and send it to them as a joke or sorts or just a ha, ha, I'm on the beach and everytime you walk in the house, you have to stand in the laundry room halfway naked since your Levi's are in the dryer warming up. I lived in upstate New York for 15 years so I know these kinds of things. It's a totally fun card.
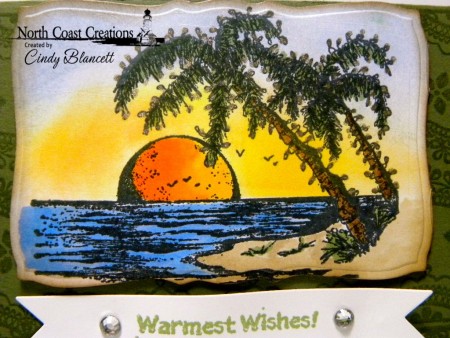
My first card has a very clean sketch so the image would pop out and definitely be the focal point. I stamped my image with permanent black ink and then got to work with Distress Inks and alcohol markers. The palm trees have Christmas lights on them so I used a clear glitter pen. I then cut the image out using curved rectangle dies. The image panel is on foam dots whereas I adhered the sentiment banner right onto the card with adhesive and used and pencil to get a wave and adhered it to my card embellishing the banner with faux rhinestones to tie in the glittered Christmas lights. You know how I love my dimension! Any time that I do any techniques that might warp the white paper, I make sure to adhere it to the mat panel with a very strong adhesive, such as Scor-Tape, as the paper might and usually does get wonky on you. I die-cut and dry embossed my image panel around the edge using curved rectangle die-cuts. I then used a very light distress ink and foam pad to distress the border of my image panel. I advise that you color in your Christmas lights with your glitter gel pen AFTER you run your image panel through your cutting machine or make sure that it is completely dry. I had to touchup a few of my Christmas lights. To finish my card, I then took a larger curved rectangle die-cut and cardstock, folded the card stock and while placing my die-cut, I made sure that I left a little bit at the top so I could have a top opening card. My card base stock is a patterned dark sage from my craft paper box.
Julie Warner's card is beautiful as she really brought out the detail of the palm trees coloring her lights in different colors.

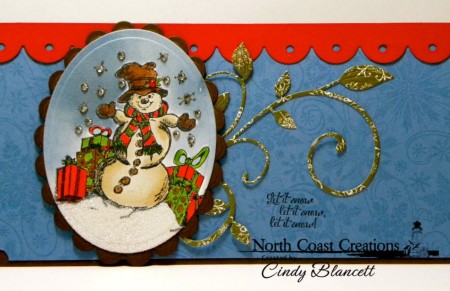
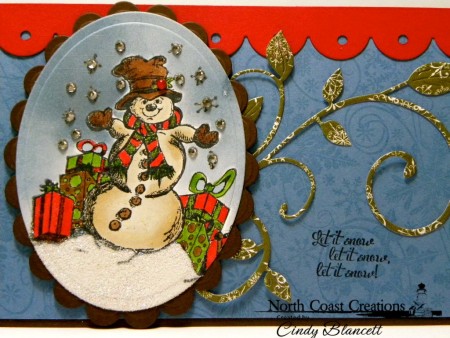
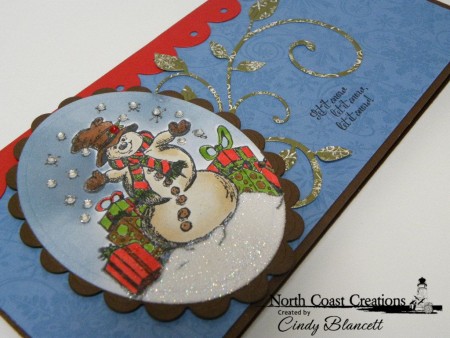
For my next card, I'm using the new Let It Snow stamp set. I stamped the snowman image twice onto white card stock with black permanent ink and fussy cut one of them out so I could mask off the snowman for a few techniques. To color the sky of this image. I have a video to share with you below. I combined Distress Ink with my own concotion of powerdered pearls. It was one of those "I'm going to give this a shot and see how it turns out and if it's cool, I better make a video on it to share." That's pretty much the story. This card measures 8 x 4. I wanted to bump up the color and texture factor a bit. My card base is a dark brown and I stamped Snowflake Background by Our Daily Bread Designs on a piece of blue card stock using frosted embossing ink that matched closely with my sky. I wanted to bring in another color and I chose red with some green accents, which I used for my accent piece at the top of the card that I die-cut using a scallop. I punched holes in the middle of each scallop for added interest. I then removed my mask from the image and started coloring. I added glitter to the bottom of the image as my "snow." I used a clear gel pen to color in the snowflakes falling from the sky and added various sizes of rhinestones to the middle of them. I colored my image using alcohol markers and my snowman is a bit on the "dirty" side but I like how he turned out. After coloring the image, I stamped my sentiment in the towards the bottom center of the card. I die-cut a Fanciful Flourish onto green snow-themed patterned paper to tie the green in with the rest of the card and assembled my card, and here's how it turned out. I have a video for you under the cards to show you how I did my ink distressing and made my own color of powdered pearls. Thank you so much for stopping by to visit me today and God bless!
Don't forget to stop by the rest of the Design Team blogs to see how they presented their snowman. They are all very beautiful.
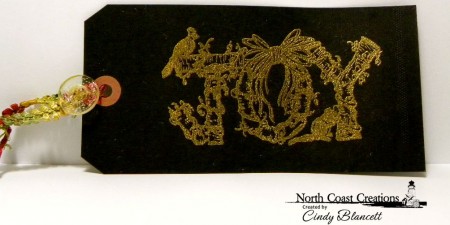
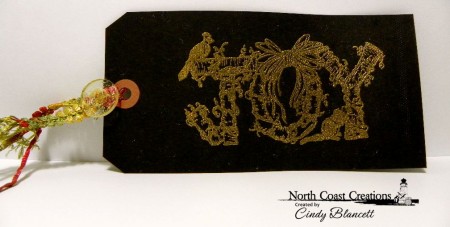
For my last project, I did something that took minutes to do and I like the way it turned out. I inked up the Joy stamp with embossing ink that had a glitter shine to it and then heat embossed it with a combination of gold powder and gold glitter. I then got into my "ribbon I will never use but better keep it just in case," that's years old stash and found this funky non-Christmas, almost elastic-like with fibers ribbon. I threaded it through the top of a #8 black craft tag. I found a button that matched perfectly with one of the colors in the ribbon yet was light enough to make a glittered button. I used some colored glue with glitter to make my button. I then got some gold wire, straightened it out, threaded it through the button and then twisted it in the back a few times and snipped the ends. This would look really coof with a kraft tag and red ink. I will definitely be trying that and might even add it to this post! If not, you will see it on another post, that's for sure. After I took my pictures, and this happens to me a lot and bums me out, although sometimes I will change my design and take another picture, is that this is a great tag to put enamel dots on or a little trinket or two, crystals would be perfect and that's what I had in mind. They're not too much bling since the tag already has that, as well as great texture, but it would just add a little subtle balance. My tag is below. I couldn't decide which picture looked the best so I'm using them both. I hope that you enjoy them!
Thank you so much for stopping by to visit me today. You will definitely enjoy this new release!


I like the way experiment went. The sky turned out very well. Edna
All 3 are wonderful, Cindy! Such vibrant colors and fun layouts. Fab job on all!
Great job, beautiful projects, and I loved the video. Thanks so much for sharing.
Wonderful cards Cindy! The sunset looks wonderful on the Warmest Wishes card, and the ODBD Snowflake BG compliments the whimsical snowman!
Beautiful cards Cindy! I love the coloring on your vivid sunset and arling snowman! And that gold embossing on JOY… WOW!!! So very striking!
I like the gold florish behind the snowman. It made the gold snowflakes "pop". The grey clouds in the background gave me the feeling it was going to snow again…that I lived in South Dakota LOL
LOVE your creations…
Such cute cards, Cindy! Thanks for joining us on the team!! So fun and colorful!!
Stunning cards Cindy! Love the vivid colours and the great gold touch on the tag!
Wonderful samples, Cindy! love the sponged sky on the snowman!!
All 3 projects are so cute! Great coloring and embossing – TFS!
Cindy we are so happy to have you on the team! Your cards are both fantastic! Love your coloring on both!
Fun snowman card. I do like the way your sky turned out. I think that with those gems on the snowflakes, he looks like he is tossing snowballs into the air. Thanks for the video showing how to make the sky.