

Hi friends. I have very fun card to show you today that we are going to make in the picture above for Flourishes Stamps 10-Minute Tutorial. I am so exited to show you what I stumpled upon. As you know, Flourishes has this great Color Made Easy system that takes all of the guesswork out of making a card, such as color combinations, ink and embellishments. Memento Ink is part of the Color Made Easy lineup. Memento Inks are made by Tsukineko. There is now a new line of Memento Inks called Memento Luxe. I love them! They are made for Mixed Media but since when does that stop a stamper?! These inks are a new favorite in my craft studio. There's a set of 24 and they are the exact name and colors of the current Memento Dye Ink pads, but the Memento Luxe is more of a pigment ink with a spongy foam pad. The color is amazing! I incorporated the Rich Cocoa Memento Luxe Ink into my card. You will have to heat set this ink if you're impatient or you can let them dry. If you would like to see these fabulous inks in the Flourishes Store, leave a comment to let Jan Marie Caruso know. Since Flourishes is very responsive to their customers and if enough of you show an interest, you just might meet them one day as part of the Color Made Easy lineup! Did you know that the store already carries two Luxe inks of Rich Cocoa and Tuxedo Black? Your regular Memento Ink pads will also work wonderfully as well so don't think that you can't do this project if you don't have the Memento Luxe. These inks come in a set of 24 or you can purchase them separately.
;">Stamps:</span></strong> * </div> <div> <strong><span style="color: rgb(186, 41, 38);">Card Stock:</span></strong> * </div> <div> <strong><span style="color: rgb(186, 41, 38);">Ink:</span></strong> * </div> <div> <strong><span style="color: rgb(186, 41, 38);">Markers/Colored Pencils:</span></strong> * </div> <div> <strong><span style="color: rgb(186, 41, 38);">Patterned Paper:</span></strong> * </div> <div> <strong><span style="color: rgb(186, 41, 38);">Jewels/Pearls/Glitter:</span></strong> * </div> <div> <strong><span style="color: rgb(186, 41, 38);">Ribbon/Twine:</span></strong> * </div> <div> <strong><span style="color: rgb(186, 41, 38);">Felt/Material:</span></strong> * </div> <div> <strong><span style="color: rgb(186, 41, 38);">Die-Cuts:</span></strong> * </div> <div> <strong><span style="color: rgb(186, 41, 38);">Punch:</span></strong> * </div> <div> <strong><span style="color: rgb(186, 41, 38);">Tools:</span></strong> * </div> <div> <strong><span style="color: rgb(186, 41, 38);">Technique:</span></strong> * </div> <div> <strong><span style="color: rgb(186, 41, 38);">Misc:</span></strong> * </div> <div> <strong><span style="color: rgb(186, 41, 38);">Size:</span></strong> * </div> <p> <a href="http://s3.beta.photobucket.com/user/YankeePics/media/InstructionsGraphic_zps97d0b298.png.html" target="_blank"><img alt="Photobucket" border="0" src="http://i3.photobucket.com/albums/y55/YankeePics/InstructionsGraphic_zps97d0b298.png" /></a> </p> <p> <a href="http://s3.beta.photobucket.com/user/YankeePics/media/1_zps0b15f6ed.png.html" target="_blank"><img alt="Photobucket" border="0" src="http://i3.photobucket.com/albums/y55/YankeePics/1_zps0b15f6ed.png" /></a> * </p> <p> <a href="http://s3.beta.photobucket.com/user/YankeePics/media/2_zps5e35a9a2.png.html" target="_blank"><img alt="Photobucket" border="0" src="http://i3.photobucket.com/albums/y55/YankeePics/2_zps5e35a9a2.png" /></a> * </p> <p> <a href="http://s3.beta.photobucket.com/user/YankeePics/media/3_zps6c5f2a28.png.html" target="_blank"><img alt="Photobucket" border="0" src="http://i3.photobucket.com/albums/y55/YankeePics/3_zps6c5f2a28.png" /></a> * </p> <p> <a href="http://s3.beta.photobucket.com/user/YankeePics/media/4_zpsf1d4b9ef.png.html" target="_blank"><img alt="Photobucket" border="0" src="http://i3.photobucket.com/albums/y55/YankeePics/4_zpsf1d4b9ef.png" /></a> * </p> <p> <a href="http://s3.beta.photobucket.com/user/YankeePics/media/5_zpsfdaf18da.png.html" target="_blank"><img alt="Photobucket" border="0" src="http://i3.photobucket.com/albums/y55/YankeePics/5_zpsfdaf18da.png" /></a> * </p> <p> <a href="http://s3.beta.photobucket.com/user/YankeePics/media/6_zpsdb57c31e.png.html" target="_blank"><img alt="Photobucket" border="0" src="http://i3.photobucket.com/albums/y55/YankeePics/6_zpsdb57c31e.png" /></a> * </p> <p> <img alt="CindySignature" class="alignleft size-full wp-image-11508" height="74" src="https://www.cindybdesigns.com/wp-content/uploads/2012/12/CindySignature.png" width="190" /> </p> <p> <a href="http://pinterest.com/cindycoutts/"><img src="http://i3.photobucket.com/albums/y55/YankeePics/Image_zpse3a44475.jpg" /></a> </p>)
Since the Luxe pads are specifically made for Mixed Media, they are a bit on the "slick" side when you try to stamp them on any type of paper (unless it's textured). By the time you stamp on a Mixed Media project, there's normally a few layers of various product underneath which will help the stamped image using the Luxe to "stick" more.
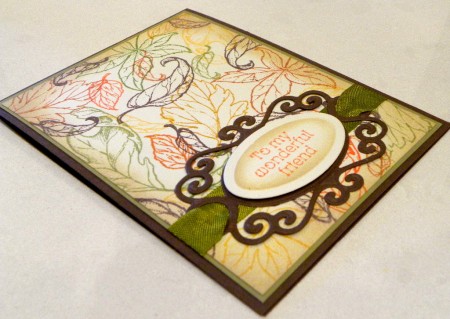
My card is a One Sheet Wonder (OSW), and that's where you basically make your own background. I used the Falling Leaves stamp set, which is an older stamp set and mine has been lovingly used over the past few years. You can make such beautiful cards with this stamp set. A simple Spellbinders die-cut was used for my sentiment panel and I threaded ribbon through the 2-part die-cut. My image panel is from the Victorian Oval Die. I simply used the outline stamps with various colors to get my background. These cards can be easily mass produced too. Take your ink a bit further by stamping off before you stamp onto the ivory card stock.
Thank you for stopping by to see me today! God bless you and have a great week. Below are the instructions and pictures. The pictures will be above the instructions.

 When stamping a One Sheet Wonder, start from the middle and work your way out.
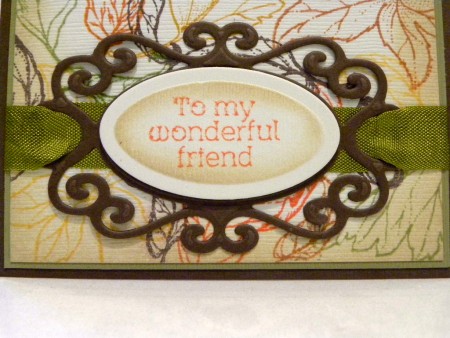
 Keep embellishments to a minimum to let your stamped background take front and center stage.
 Use ribbon and a fancy flourished tag for your sentiment for an easy, but lovely focal point to accent your One Sheet Wonder.


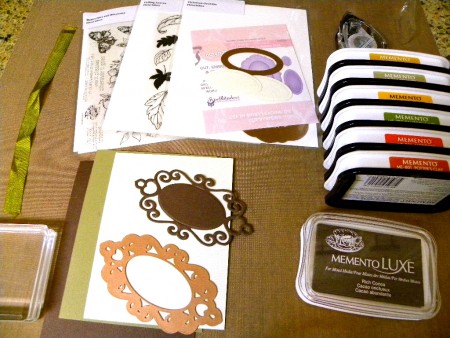
Cut Rich Brown card stock to A2 tent size with the crease at the top, fold and burnish. Cut Evergreen card stock to 4-1/16 x 5-5/16. Cut Ivory card stock to 3-15/16 x 5-3/16. Get the rest of your supplies out and organized. A lot of times when stamping with photopolymer stamps, I use a foam pad under the paper.
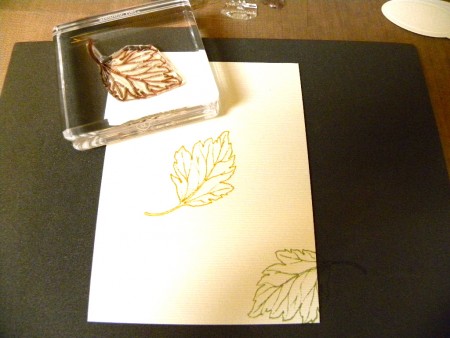
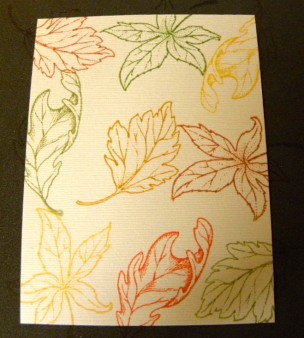
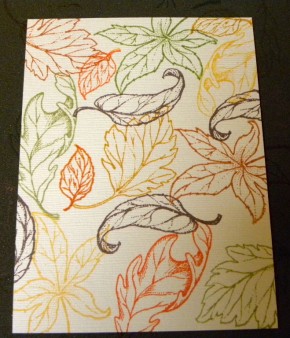
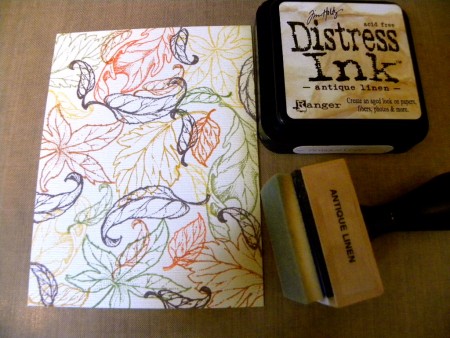
Stamp line art leaf images onto Ivory card stock with your choice of fall-colored ink starting at the center and moving out using a variety of line art leaf images. Use the smaller images in the open spaces to fill in the card stock for good coverage. Lastly, stamp the Memento Rich Cocoa Luxe Ink filling in more spots with various leaves from the stamp set. Use Antique Linen Distress Ink to distress the Ivory image panel. When stampin the leaves, I did not clean my stamp.
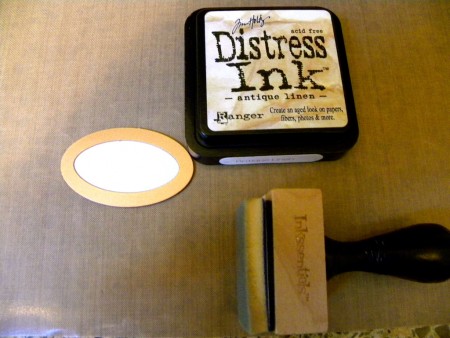
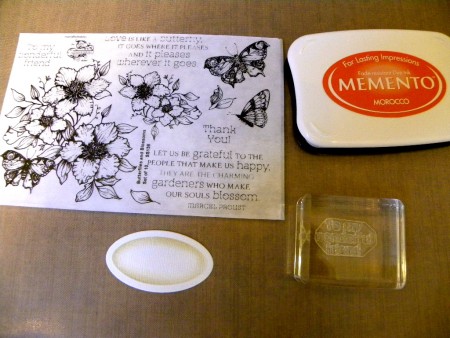
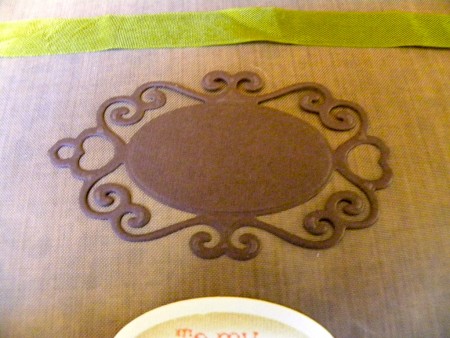
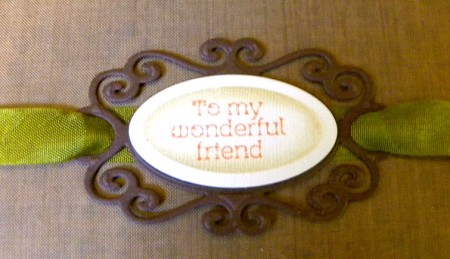
Choose seam binding ribbon from the Pistachio Collection and a sentiment size to fit inside Victorian Oval die-cut. Pick a large lacy die-cut to adhere the sentiment panel to. I used Fancy Tags 2. Ink distress the sentiment panel while still in the die-cut lightly. Stamp sentiment with Morocco ink and adhere to the Rich Brown die-cut with foam dots. NOTE: On the picture with the brown Fancy Tags 2 die-cut, the left side is how the die-cut is in its entirety. On the right side, I cut off that litle loop so that it would fit on my card, show the ribbon, and I could thread my ribbon through easier.

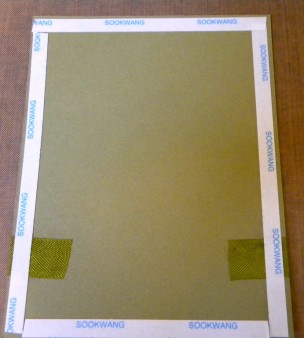
 Adhere the Ivory image panel to the Evergreen card stock. Place sentiment panel at the bottom of the carrd and adhere with a strong adhesive, such as Scor-Tape. This will also hold the ribbon in place. Center panel and adhere the ribbon to the back of the image panel. Snip off any excess. Place Scor-Tape around the entire perimeter of the image panel as shown. I used 1/4" here.
 Adhere the image panel to the Rich Brown card stock and you're done! You made a beautiful card in less than 10 minutes!


Just stunning colours and all the different styles of leaves are wonderful together! I love how you did the sentiment…just beautiful!