Hello my friends. Today is the day that you've been waiting for! It's the April Release at Inspired by Stamping! Please visit the store or Joanna's blog for full reveals of the 7 newly released stamp sets. For my cards, I am using 3 of the new stamp sets of Washi Tape, Big Wishes and Spring Blossoms.
I have two blog posts for you today. First is obviously this one announcing the release and the second is our Whoo Hoo Wednesday #96 where I'm going to show you a video tutorial on organizing your embellishments. You are going to love the project that I will be demonstrating for you. It's easy, cost effective and fun.
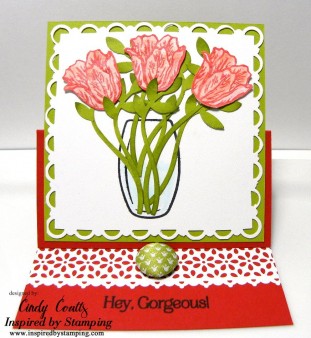
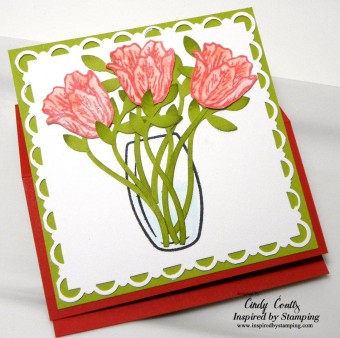
For my first card, it's an easel card, that's the perfect girlfriend card, which I've never made before but it's super easy. I will give you a full product list and step-by-step instructions as to how I made it. My new go-to ink now is chalk ink and they are incredible. I'm using Tsukineko VersaMagic Chalk Ink. The DewDrops (small ink pads) provide amazing coverage and the color is wildly vivid. They are also easy on the budget. I have also started using India Ink rather than Memento and am having excellent results with that as well, but have only tried it on a few projects. With my Gorgeous Tulips card, you can see how vivid the India Ink is and Copic marker friendly since I lightly colored the bottom half of the vase to mimic water. I used my Silhouette to cut out the tulips, stamped them with red chalk ink and then let them set overnight as I wasn't sure what I was going to do next with the card. I know the chalk ink will heat emboss beautifully with some clear embossing powder if you're impatient (aren't we all?) to get on with your card. I used a pink and red colored pencils to color the inside and then watercolored the tulips to blend. Be very careful with this step as I did not use watercolor paper and you don't want your brush too wet so be sure to dab it on a paper towel frequently and leave it wet enough to move around the color.
Enjoy and don't forget to check out what the rest of the design team made for you too!


 Experiment with the colors of the tulips.
 Try different techniques to make your easel card.
 Change the size. My card is 4" square.


Cut red card stock to 4 x 8. Score at the 2" mark and 4" mark. Cut a piece of green card stock to 3-3/4" square and a piece of white card stock to 3-3/4". Using coordinating corner and border punches, punch around the white card stock. Adhere the white card stock to the green card stock.
Die-cut/fussy cut 3 tulip images using white card stock and stamp image with red chalk ink. Color in the tulips with pink and light red pencils using a watercolor pen to move around the color. Stamp vase onto the white card stock with black dye ink and color in the bottom half with a light blue marker.
Punch out and ink distress several leaves and branches and adhere to the white card stock inside the vase with a glue pen. Adhere and arrange tulips to the branches and leaves with glue dots. Using a strong adhesive, on the bottom 2" of the image panel, adhere it to the 2" side of the red card stock.
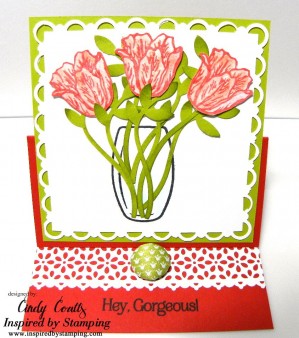
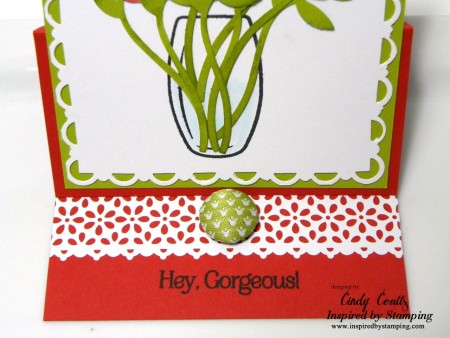
 Stamp sentiment using black dye ink at the bottom of the 4" section of the easel card. Adhere a strip of lace tape above the sentiment.
 Cut the prongs off of the back of a fabric brad and adhere to the center of the lace tape to prop the card.
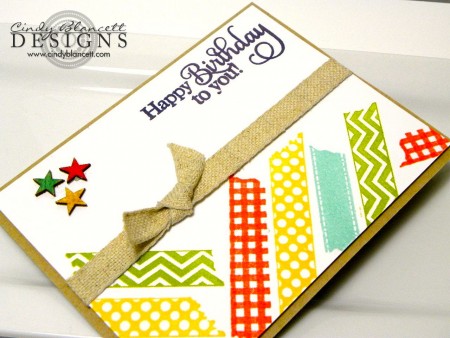
For my next card, I used the Washi Tape and Big Wishes stamp sets. This card was so easy to put together and took no time at all, not to mention was fun. The new Washi Tape stamp set is so cool and there's nothing else like it on the market. I love that I'm able to fully customize the colors and even mix and match patterns using various techniques. I also broke out some wood star embellishments and colored them with markers to coordinate with my Washi Tape colors. This card is rustic and colorful. So may possibilities!
I hope that you enjoy this card as much as I enjoyed making it! Thank you again so much for stopping by to visit me today and remember, I also have a video to share with you as well in another post on organization that you will love.
God bless you and make it a great day!
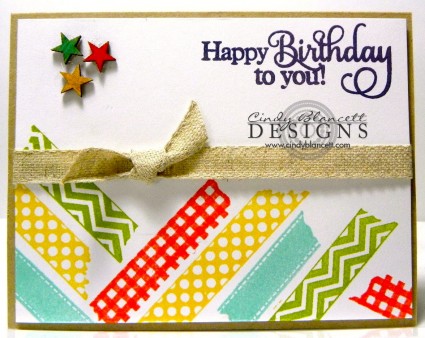
The possibilities are endless with this stamp set so experiment away with colors and patterns. Imagine the great backgrounds you can make, even by going monochromatic.
Challenge yourself to use the stamps in a pattern like I did.
Add unexpected embellishments, like wood or even lace.
Cut a piece of Kraft card stock to A2 tent size. Cut a piece of white card stock to 5-5/16 x 4-1/16.
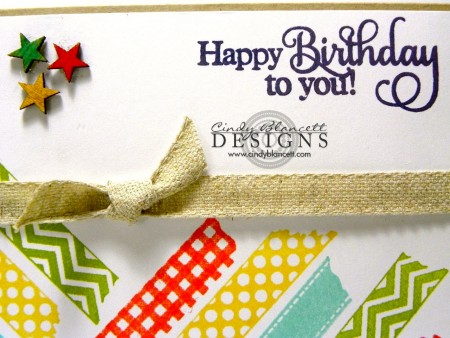
Choose ink colors of your choice and stamps to make a pattern on the bottom half of the white card stock alternating colors and stamps to evenly space out. Stamp sentiment in upper right corner.
Cut a length of Natural Trim Ribbon and place across the middle of the card adhering the edges to the back of the white card stock. Cut another length of Natural Trim Ribbon and slip under the longer length of ribbon to tie a "cheater's" knot as shown.
Pick out 3 large wood stars and adhere to the upper left side of the card for balance using a glue gun and color in with markers.
Place foam tape onto the back of the white card stock and adhere to the Kraft card stock.


1 thought on “April Release Day at Inspired by Stamping!”
Comments are closed.